


Most winter home disasters do not start in winter. They start on a mild Saturday in October, when a hose stays on the faucet, a gutter stays full, and a furnace filter stays dirty, because nothing seems urgent yet.
Then the first hard freeze arrives overnight. By morning, a pipe has cracked behind a wall, or the furnace has quit on the coldest day of the year, or water is pouring over a clogged gutter and into your foundation. Nothing about it was bad luck. It was a to-do list that never got done.
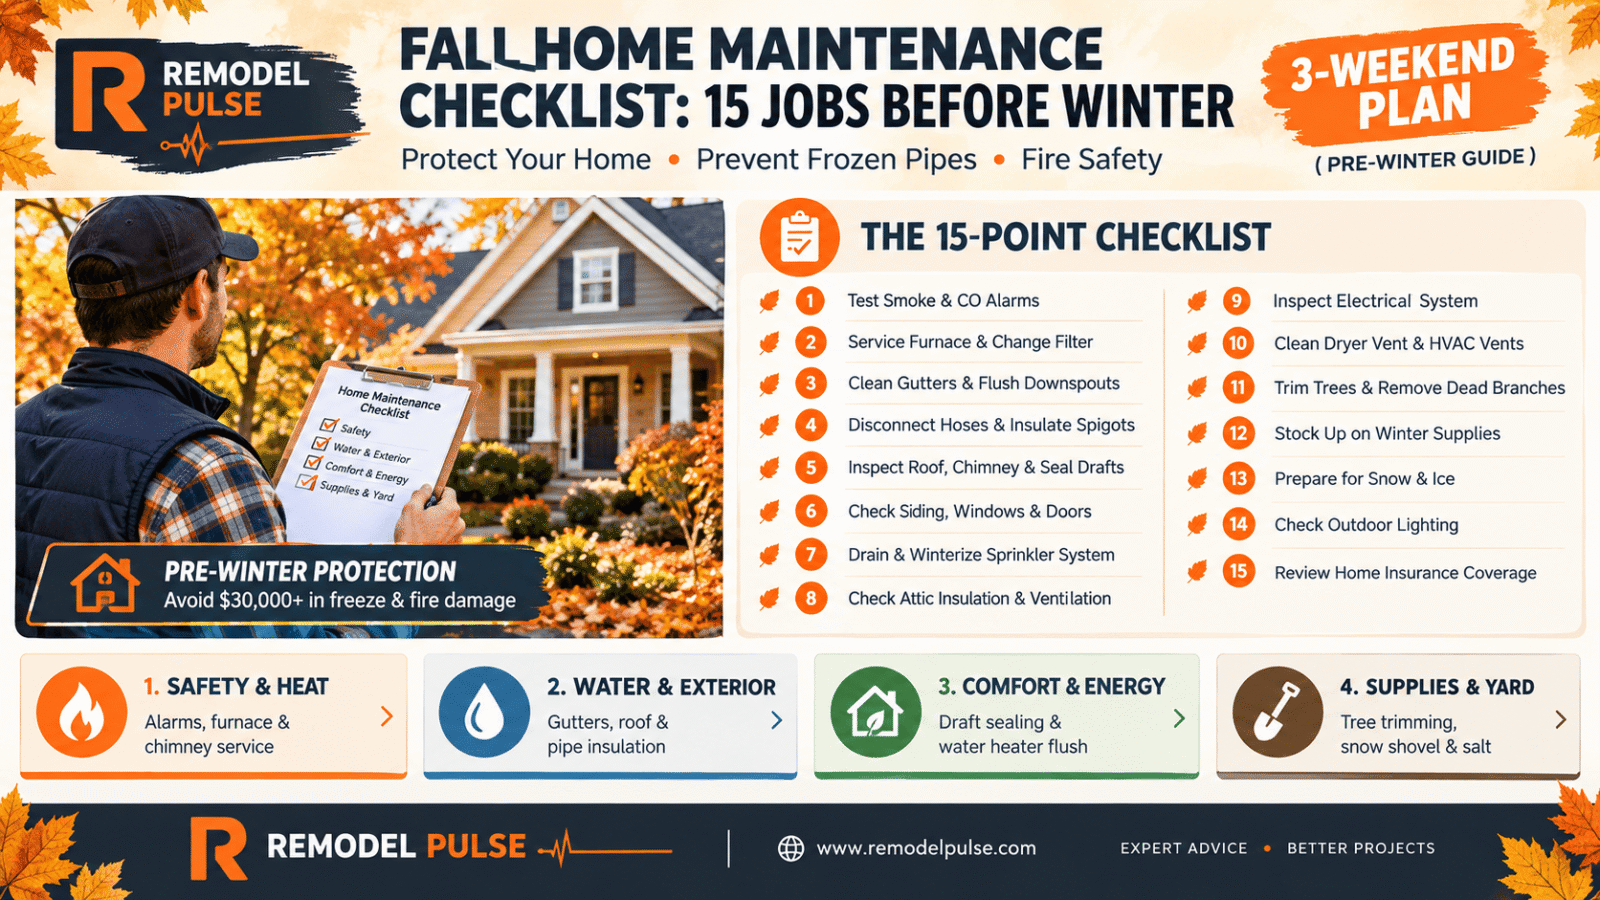
This checklist fixes that. It has 15 jobs, each with the reason it matters, how to do it, and how long it usually takes. You do not need to be handy, just a few free weekends.
The 60-second version
If you do nothing else, do these five: test your smoke and CO alarms, change the furnace filter, clean the gutters, disconnect your garden hoses, and book the chimney and furnace inspections. They cover the biggest risks to your family, your pipes, and your budget. The other ten jobs below make the house safer, warmer, and cheaper to run.
Why fall is the real deadline
Here is the uncomfortable truth about home maintenance: the cost of skipping it is rarely small, and it almost always shows up at the worst time.
Take frozen pipes. State Farm reported handling more than 20,000 winter water damage claims from 2024 through June 2025 and paying out over $628 million, with the average claim topping $30,000. That figure includes every kind of freeze-related water damage, so your own bill could be lower or higher. Other estimates run closer to $10,000 to $14,000. Either way, it costs far more than a foam faucet cover.
The danger point for indoor pipes is around 20 degrees Fahrenheit, according to insurance industry guidance, and outdoor plumbing is at risk even earlier, once temperatures drop to about 28 degrees for a few hours. A crack as small as one-eighth of an inch can spill more than 250 gallons of water a day. That is a flooded basement by the time you wake up.
Fire risk climbs in the cold months too. The Consumer Product Safety Commission estimates about 360,000 residential fires a year in the United States, and heating equipment, chimneys, and dryers are common culprits.
There is a practical reason to start now as well. Furnace technicians and chimney sweeps get booked solid once the weather turns. And the clock change is a built-in deadline: daylight saving time ends on Sunday, November 1, 2026, which is the perfect day to test every alarm in your house.
A three-weekend plan so it actually gets done
Big lists feel heavy, and heavy things get postponed. So do not try to do all 15 jobs at once. Split them into three short sessions, put them on your calendar right now, and treat them like appointments. People who schedule a task with a specific day and time are far more likely to follow through than people who just intend to do it “sometime soon.”
| Weekend | Focus | Jobs | Rough hands-on time |
|---|---|---|---|
| 1 | Safety and heat | 1 to 4 | About 2 to 3 hours, plus a few phone calls to book pros |
| 2 | Water and exterior | 5 to 8 | About 3 to 4 hours |
| 3 | Comfort, energy, and grounds | 9 to 15 | About 3 to 5 hours |
Times are rough estimates for an average home. Finish one weekend and you will feel the momentum. That small win carries you into the next one.
Part 1: Safety and heat
1. Test your smoke and carbon monoxide alarms
This takes about 20 minutes and it might save a life. The CPSC recommends smoke alarms on every level of the home, inside each bedroom, and outside sleeping areas, with CO alarms on every level and outside sleeping areas too.
- Press the test button on every alarm. If it is weak or silent, replace the batteries.
- Replace batteries at least once a year, unless the alarm has a sealed 10-year battery.
- Check the date on the back. Smoke alarms should be replaced every 10 years, because they become less sensitive over time. No date means replace it.
- Vacuum dust and cobwebs from each alarm so it does not false-alarm.
Do this on Sunday, November 1, when the clocks go back. Tie it to something you already do and it becomes automatic.
2. Service the furnace and change the filter
Heating systems are best inspected before the first cold snap, not during it. Call an HVAC professional now to book an annual tune-up. They will check the burners, heat exchanger, venting, and safety controls, and they can catch a carbon monoxide risk before you ever smell a thing.
The filter is a job you can do yourself in five minutes. A clogged filter forces the furnace to work harder, which wastes energy and can cause overheating. Thin one- to two-inch filters usually need changing every one to three months, while thicker filters last longer. Check your filter’s label and write the date on the frame so you know when it is due.
Also keep flammable items, like boxes, paint, and laundry, at least three feet away from the furnace and any space heaters.
3. Have the chimney inspected
If you burn wood or use a gas fireplace, this one is non-negotiable. The National Fire Protection Association’s standard says chimneys, fireplaces, and vents should be inspected at least once a year. The Chimney Safety Institute of America says an inspection before your first fire of the season is the best way to prevent damage or loss of life from a damaged or blocked chimney.
- Hire a certified chimney sweep. You can find one through the CSIA directory.
- Keep tree branches at least 15 feet away from the top of the chimney.
- Make sure the chimney has a cap to keep out animals and debris.
- Look up with a flashlight and check that the damper is open before you light a fire.
4. Clean the dryer vent
This one is easy to forget and surprisingly dangerous. The CPSC estimates about 6,400 clothes dryer fires a year in the United States. The agency recommends cleaning the lint filter before or after every load and clearing lint out of the vent pipe at least once a year.
Pull the dryer away from the wall, disconnect the duct, and use a dryer vent brush kit or a vacuum to clear it. Then go outside and confirm the vent flap opens freely when the dryer runs. If you cannot reach it, hire a professional.
Part 2: Water and the outside of the house
5. Clean the gutters and downspouts
Gutters carry water away from your roof and foundation. When they clog, water backs up under shingles, spills over the edges, and pools next to the foundation. In cold climates, it also feeds ice dams, which can push water under your roof.
Wait until most of the leaves have fallen, then clear the gutters by hand or with a scoop. Flush them with a hose and watch the downspouts. If water comes out slowly or not at all, there is a clog. Make sure downspouts discharge at least a few feet away from the house. Use a stable ladder with someone holding it, and hire a pro for tall or steep roofs.
6. Look over the roof, flashing, and vents
You do not have to climb up there. Walk around the house with binoculars and look for missing, curled, or cracked shingles, damaged flashing around the chimney and vents, and sagging sections. Check the attic ceiling for water stains too, since that is where roof leaks often show first.
A few missing shingles are an easy fix now and an expensive repair later. If you find damage, get a roofer to look, and see our guide on how to read a contractor quote.
7. Disconnect hoses and shut off outdoor water
This is the fastest, cheapest way to prevent a burst pipe, and most people skip it. A hose left on the spigot traps water right where the cold hits hardest. The water freezes, expands, and can crack the pipe inside your wall.
- Unscrew every garden hose, drain it, and store it indoors.
- Find the indoor shutoff valve that feeds each outdoor faucet, usually in the basement, crawl space, or utility room, and turn it off.
- Open the outdoor faucet to let the remaining water drain, and leave it open.
- Add an insulated foam faucet cover.
- If you have a sprinkler system, drain it or have it blown out by a professional before the first freeze.
8. Insulate exposed pipes and find your main shutoff
Pipes in unheated spaces, like crawl spaces, attics, garages, and along exterior walls, are the ones that freeze. Slide foam pipe sleeves over any exposed lines. It costs very little and takes under an hour for most homes.
Then do something even more important: find your main water shutoff valve and make sure it turns. Tag it with a bright label. If a pipe ever bursts, shutting off the water in 30 seconds instead of 10 minutes can save you thousands of dollars in damage. Show everyone in the house where it is.
Going away this winter?
Insurers and plumbers commonly advise keeping the thermostat at 55 degrees Fahrenheit or higher, even when you are out of town. Also note that insurance generally covers sudden damage like a burst pipe, but damage that builds slowly from poor maintenance may not be covered, so keep records of what you did and when.
Part 3: Comfort and energy
9. Seal air leaks around doors and windows
Gaps around doors, windows, and where pipes and wires enter the house let heated air out and cold air in. On a windy day, hold a lit incense stick near the edges of windows and doors. If the smoke wiggles, you have a leak.
- Replace worn weatherstripping around doors.
- Add a door sweep to the bottom of drafty exterior doors.
- Re-caulk gaps around window and door frames and where pipes pass through walls.
- Use window insulation film on old single-pane windows for a low-cost boost.
Be realistic about savings. The EPA estimates that homeowners can save an average of 15 percent on heating and cooling costs, or about 11 percent on total energy costs, by air sealing their homes and adding insulation in attics, floors over crawl spaces, and accessible basement rim joists. That figure comes from doing both, not from caulk alone, but sealing leaks is one of the cheapest places to start. You can see the details on the ENERGY STAR seal and insulate page.
10. Check the attic insulation and ventilation
Open the attic hatch with a flashlight and look around. You are checking for four things: insulation that is thin, compressed, or missing in spots, wet or stained insulation, daylight coming through the roof deck, and any signs of pests. Clear soffit vents so air can flow.
If you can see the tops of the floor joists, you probably need more insulation. ENERGY STAR publishes recommended R-values by climate zone, and an insulation contractor can measure and quote the job. If several problems show up at once, our guide to the signs your home needs a renovation can help you decide what to fix first.
11. Flush the water heater
Over time, sediment settles at the bottom of a tank water heater. It makes the unit noisy, less efficient, and shorter-lived. Many manufacturers recommend draining a few gallons about once a year to clear it. Follow your manual, because steps differ by model.
- Turn off the power (electric) or set the gas control to pilot or off.
- Attach a garden hose to the drain valve and run it to a floor drain or outdoors.
- Open the valve and let some water out, being careful because it can be very hot.
- Close the valve, refill the tank, and restore power or gas.
12. Test the sump pump
If you have a basement or crawl space with a sump pit, test it before the rain and snowmelt arrive. Pour a bucket of water into the pit. The float should rise, the pump should turn on and discharge the water outside, and then shut off. If it hums, struggles, or does nothing, call a plumber. Check that the discharge line is clear and drains away from the house.
Part 4: Grounds and supplies
13. Trim trees and clear branches
Heavy snow and ice can snap overhanging branches onto your roof, car, or power lines. Trim limbs that hang over the roof or touch the house. Keep branches away from the chimney, as noted above. Never trim near power lines yourself. Call your utility company or a licensed tree service for anything close to wires.
14. Check the foundation, grading, and walkways
Walk the perimeter and look for small cracks in the foundation, driveway, steps, and walkways. Water gets into cracks, freezes, and widens them, so seal small gaps with a concrete crack sealant before winter.
Also check that the soil slopes away from the house. Water should flow away from the foundation, not toward it. Hairline cracks are common, but wide, growing, or stair-step cracks deserve a professional opinion.
15. Get your winter supplies and tools ready
The worst time to buy a snow shovel is during the storm, when the shelves are empty. Spend 30 minutes now getting ready.
- Stock a snow shovel, ice melt, and sand or traction material.
- Start up the snow blower and change the oil and spark plug, or book a service.
- Store hoses, patio furniture, and grills, and cover or bring in anything that cannot take the cold.
- Put flashlights, spare batteries, and a basic emergency kit where you can find them in the dark.
- Flip your ceiling fans to run clockwise at low speed. This pushes warm air down from the ceiling. Most fans have a small switch on the motor housing.
DIY or call a pro?
| Job | DIY-friendly? | Why |
|---|---|---|
| Alarms, filters, hoses, sealing, supplies | Yes | Simple, low risk, and quick |
| Clean gutters | Yes, if you are comfortable on a ladder | Hire a pro for tall or steep homes |
| Flush the water heater | Maybe | Doable with the manual, but hot water and gas or power are involved |
| Furnace tune-up | No | Combustion and carbon monoxide safety need a trained technician |
| Chimney inspection and cleaning | No | Hire a certified sweep; hidden damage is hard to spot |
| Roof repairs, large tree work, electrical or gas issues | No | Height, power lines, and gas are serious hazards |
When you do hire someone, get the scope and price in writing, and ask whether permits are needed for anything beyond routine maintenance. Our permits guide explains how to find out.
The checklist at a glance
Copy this list, print it, or save it to your phone, and check off each item as you go.
- ☐Test smoke and CO alarms, and check their dates
- ☐Book the furnace tune-up and change the filter
- ☐Book the chimney inspection
- ☐Clean the dryer vent
- ☐Clean gutters and downspouts
- ☐Inspect the roof, flashing, and vents from the ground
- ☐Disconnect hoses and shut off outdoor faucets
- ☐Insulate exposed pipes and tag the main water shutoff
- ☐Seal air leaks around doors and windows
- ☐Check attic insulation and ventilation
- ☐Flush the water heater
- ☐Test the sump pump
- ☐Trim branches and rake leaves
- ☐Check the foundation, grading, and walkways
- ☐Stock winter supplies and reverse ceiling fans
Frequently asked questions
When should I start my fall home maintenance?
Start in early to mid fall, before the first hard freeze and while the weather is still comfortable. In most of the country that means October, and sooner in colder regions.
What is the most important fall maintenance job?
Safety checks come first: working smoke and carbon monoxide alarms, a serviced furnace, and an inspected chimney if you use one. After that, protecting against frozen pipes by disconnecting hoses and shutting off outdoor water gives you the most protection for the least effort.
Does homeowners insurance cover frozen pipe damage?
Policies commonly cover sudden damage like a burst pipe, but they may not cover damage that results from poor maintenance or neglect. Details vary, so read your policy or ask your agent, and keep records of the maintenance you do.
Can I do all of these jobs myself?
Many of them, yes. Alarm tests, filter changes, hose removal, sealing, and supply stocking are easy DIY tasks. Leave the furnace, chimney, roof repairs, and anything involving gas or electricity to licensed professionals.
Final thoughts
There is a quiet satisfaction in walking through a house you have prepared, knowing the alarms work, the pipes are protected, and the furnace is ready.
So pick your first weekend right now. Put it in your calendar before you close this page, and tell someone you live with so they can hold you to it. The best time to do this was last month. The second best time is this weekend.
Keep your home in good shape
More practical, plain-English guides on maintenance, repairs, costs, and hiring from the RemodelPulse team.